
The manage view in AlphaX Alerts is a comprehensive interface that allows you to manage and configure alerts. This guide will provide an overview of the Alerts Manage View.
The manage view in Alerts is a robust interface that allows you to configure and monitor alerts in detail. By understanding and utilising each section, you can efficiently manage your alerts, ensuring they are accurately set up and effectively monitored. Use this guide to navigate the manage view and leverage its full capabilities.
Accessing the Manage View
You can access the manage view in two ways.
-
From the List View: Click the manage action button (gear icon) on the right side of an alert in the list view.
-
From the Device Detail Events Tab: Click the alert manage action button in the device detail tab.
Manage Alerts View
Overview of the Alerts Manage View
The manage view is divided into several logical sections, each containing specific settings and information related to the event. These sections can be opened or collapsed by clicking on their titles.
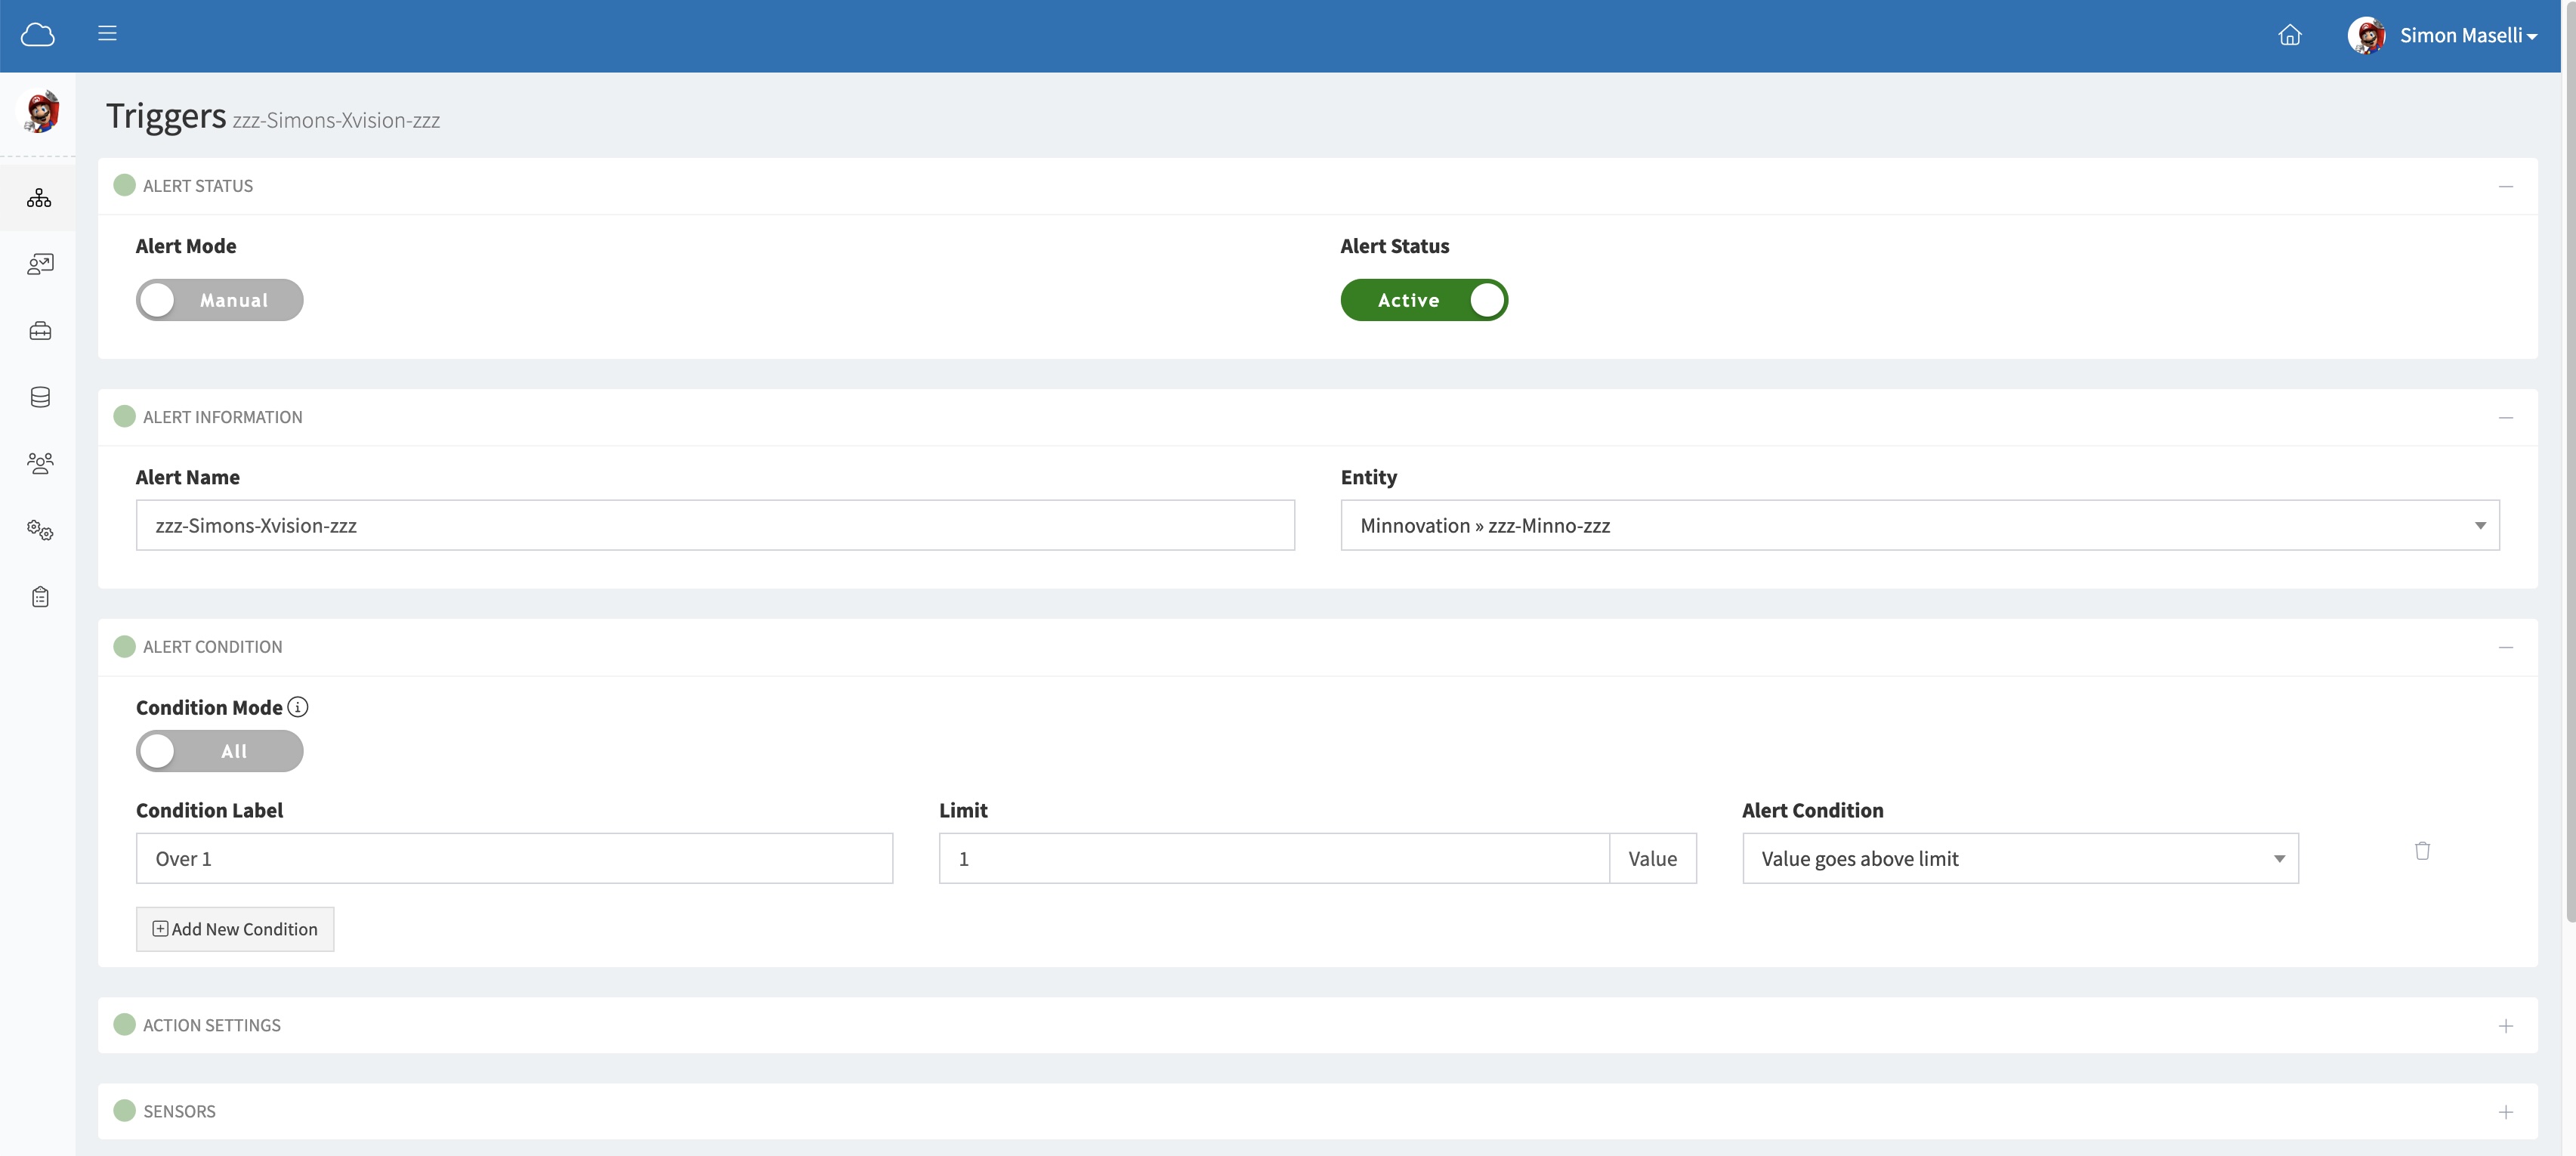
1. Alert Status
- Alert Mode: Toggle between Manual and Auto modes.
- Alert Status: Shows whether the alert is Active or Inactive.
2. Alert Information
- Alert Name: Field to set the name of the alert.
- Entity: Dropdown to select the entity associated with the event.
3. Alert Condition
- Condition Mode: Toggle between "All" or specific conditions.
- Condition Label: Field to label the condition.
- Limit: Field to set the limit value.
- Alert Condition: Dropdown to specify the alert condition type.
- Add New Condition: Button to add more conditions as needed.
- Delete Button: Each alert condition has a Delete icon next to it. When the user clicks this icon, a confirmation window will appear, asking whether they want to proceed with deleting the selected condition.
Delete Confirmation Window
The confirmation window displays the message: "Are you sure you want to delete this Alert Condition?" This allows the user a chance to review the action before confirming the deletion.
4. Action Settings
- This section allows you to define the actions that will be taken when the alert conditions are met
5. Sensors
- This section provides settings related to the sensors involved in the event.
6. Notes
- Free Text Space: Allows users to add notes related to the event. Useful for adding context, reminders, or additional information.
7. Logs
- Audit Trail: Displays a full history of all events associated with the current event, including edits, actions taken, and notifications sent. This helps in tracking the event's history and any changes made.
8. Administration
- Created By and Date: Shows who created the event and when.
- Last Edited By and Date: Shows who last edited the event and when.Using the Manage View
Using the Management Interface
Managing Alert Information
- Set Alert Name: Enter a descriptive name for the alert.
- Select Entity: Choose the appropriate entity from the dropdown menu.
Configuring Alert Conditions
- Choose Condition Mode: Toggle between "All" conditions or specific conditions.
- Label Conditions: Provide a label for each condition.
- Set Limits: Enter the threshold values for conditions.
- Specify Alert Conditions: Select the type of condition (e.g., value goes above limit).
Adding Notes
- Enter Notes: Use the free text space to add any relevant information or context about the event.
Reviewing Logs
- Audit Trail: Check the logs section to see a detailed history of actions, edits, and notifications related to the event.
Viewing Administration Details
- Creator Information: View who created the event and when it was created.
- Last Editor Information: View who last edited the event and when it was edited.
Detailed Sections
Some sections of the manage view contain more detailed configurations that will be explained on separate pages. These include:
Event Status
-
Details about the event's current operational status and how it is managed within the system.
Event Conditions
-
Comprehensive setup of the conditions that trigger the event, including multiple condition configurations.
Event Actions
-
Specifications of actions that will be executed when the event conditions are met, such as notifications, data processing, or system commands.
Event Sensors
-
Detailed settings related to the sensors that provide the data for the event triggers.
Using the Manage View
Managing Alert Information
-
Set Alert Name: Enter a descriptive name for the alert.
-
Select Entity: Choose the appropriate entity from the dropdown menu.
Configuring Alert Conditions
-
Choose Condition Mode: Toggle between "All" conditions or specific conditions.
-
Label Conditions: Provide a label for each condition.
-
Set Limits: Enter the threshold values for conditions.
-
Specify Alert Conditions: Select the type of condition (e.g., value goes above limit).
Adding Notes
-
Enter Notes: Use the free text space to add any relevant information or context about the event.
Reviewing Logs
-
Audit Trail: Check the logs section to see a detailed history of actions, edits, and notifications related to the event.
Viewing Administration Details
- Creator Information: View who created the event and when it was created.
- Last Editor Information: View who last edited the event and when it was edited.